How to Install Immich
Immich is a self-hosted photo and video management solution that allows users to back up, organize, and manage their media on their own servers, offering enhanced privacy and control over personal data. It is designed for high performance, capable of handling large media libraries efficiently. Key features include automatic backups from mobile devices, multi-user support, advanced search functionality using tags and EXIF data, image tagging, object detection, and geolocation mapping. Immich's user-friendly mobile app and web interface make it easy to upload and view media, while its active community ensures ongoing development and support. This makes Immich a robust, privacy-focused alternative to third-party cloud services for managing extensive photo and video collections.
WARNING
This guide was last tested for Immich v1.128.0
Option 1: Deploy Container Using Docker Compose
To quickly deploy Immich on UGREEN NAS, it is recommended to use Docker Compose for project management. This method is suitable when you need to create and manage multiple containers, making containerized management convenient. The following detailed steps will guide you how to deploy Immich using Docker Compose. How to Use Docker Compose on UGREEN UGOS Pro?
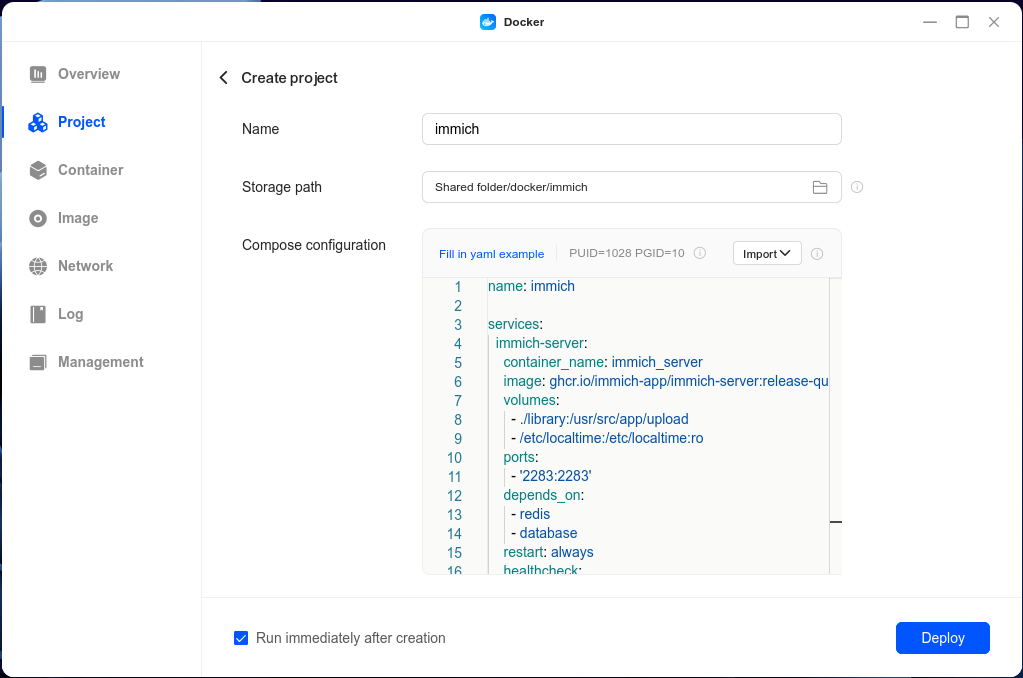
1. Access the Docker Project Interface
In the UGOS Pro system of UGREEN NAS, open the "Docker" app, click "Project > Create" to start the project creation wizard.
2. Configure the Docker Compose File
In the wizard, you'll need to provide a Docker Compose configuration file. The Docker Compose file for Immich can be found here.
Details
- Specify the Immich Docker image to use. The
latesttag ensures that the most recent version is pulled. - For
immich-machine-learning, the-openvinomakes sure the image uses the Intel machine learning capabilities. - Use the environment variable to set the container's time zone. This is essential for maintaining consistent timestamps for automated tasks and logs. You can adjust the time zone to match your location (e.g.,
America/ChicagoorEurope/Berlin).
3. Deploy the Project
After confirming that the configuration file is correct, click "Deploy Now". The system will automatically pull the image and start the container. Once the deployment is complete, you can access the Immich Webpage by visiting your-nas-name.local:2283 in your browser.
Option 2: Deploy Using SSH
If you prefer using SSH for more control over the setup process, follow these steps:
1. Connect to Your NAS via SSH
Open your terminal and connect to your UGREEN NAS using SSH:
ssh your-username@your-nas-ip2. Create a Directory for Immich
Create a new directory for Immich and navigate into it:
mkdir -p ~/immich
cd ~/immich
3. Download the Docker Compose File
Download the Docker Compose file for Immich:
wget https://raw.githubusercontent.com/UGREEN-NASync/community-guide/refs/heads/main/docs/ugos/install/immich/compose.yaml4. Deploy the Container
Run the following command to deploy the container:
sudo docker compose up -dAccess the Immich Web Interface
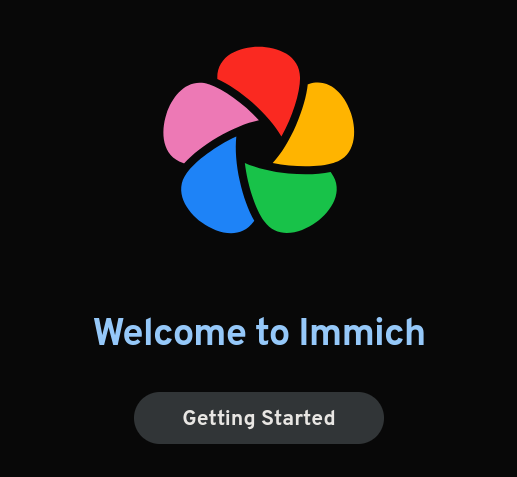
After the deployment is complete, open the browser and enter the NAS IP address or name and port (e.g., 192.168.0.188:2283 or your-nas-name.local:2283) to access the interface. Click “Getting Started” and follow the setup wizard to complete the configuration.
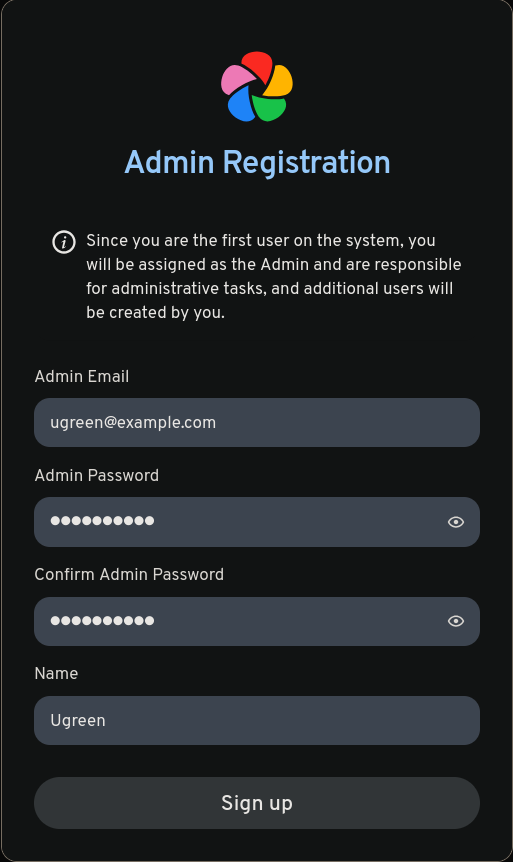
You should see a registration page for the first user (and admin) of your Immich server. Use your real email and a strong password.
After registering, you should see a login page. Use the email address you used to create the first account, and the password you set earlier. Options will present to you to be configured. Leave everything as default.
That's it! You now have a working Immich instance on your machine, congrats! 🎉
Adding More Users
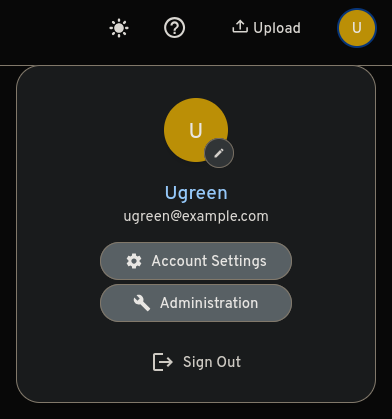
To add more users to your Immich instance, go to the top-right corner and click on "Administration".
You should see a page with all the users on Immich. You can create a new user using the button "Create user". You should see a popup to set up an email, password, name, and quota. We advise you to make sure the toggle "Require user to change password at first login" is checked. Click on "Create" to create it.
Add Hardware Transcoding
For better speed and efficiency, you can enable hardware video transcoding. Click on this link, put the address of your Immich instance (e.g., http://192.168.0.188:2283 or http://your-nas-name.local:2283), and scroll down to "Hardware Acceleration".
Alternative
You can also click on the top-right corner and click on "Administration", then click on "Settings" on the left sidebar, then scroll to "Video Transcoding Settings" and expand this section, to then expand "Hardware Acceleration".
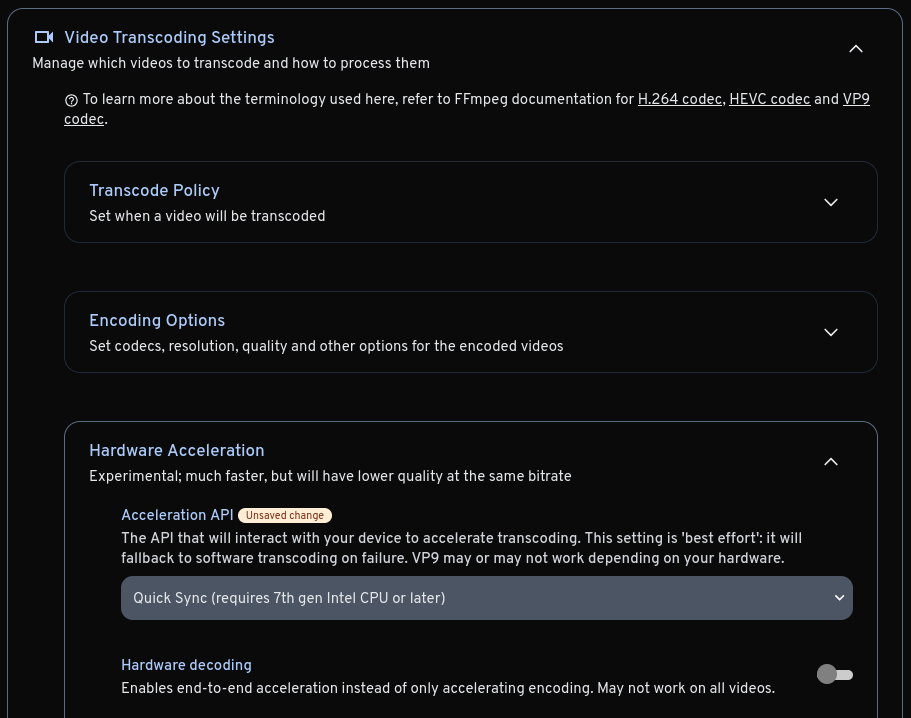
Now, you can select "Quicksync" as the Acceleration API, and save your changes on the "Save" button at the end of the web page. You now have hardware transcoding enabled! 🎉
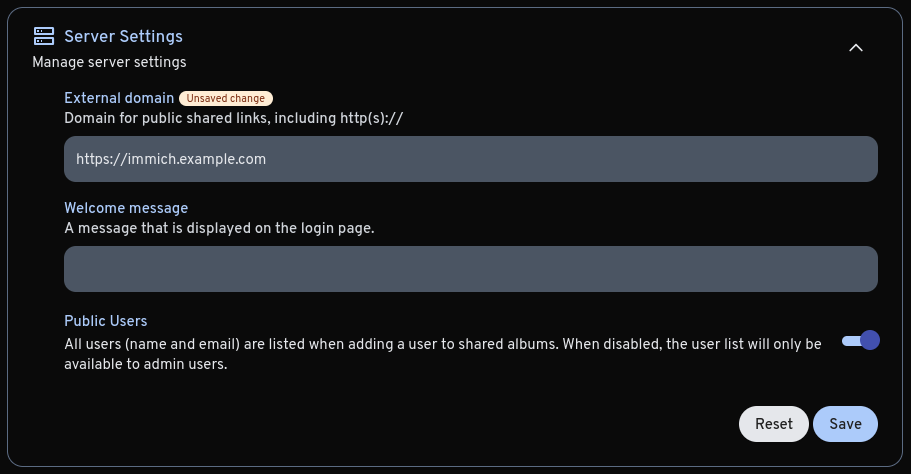
Configure the External Domain
If you configured Immich to be accessed outside, via a reverse proxy or a tunnel, you may add the address to your instance. On the administration settings pages, you may find a "Server Settings", or click on this link.
By expanding this section, you may put your external URL, with http:// or https://, depending on your configuration.
This part is really important to add email support.
Adding Email Notifications
To add email notifications, if you have an external domain, you must first configure the external domain.
First, you need to have an email provider that allows you to send emails via an SMTP server.
Details
There's a reddit thread for email providers with SMTP support for a homelab. You could also use your own email, with Gmail, Outlook, or a lot of other email hosting services.
After that, you need to go to "Notification Settings", on the administration settings pages, or click on this link.
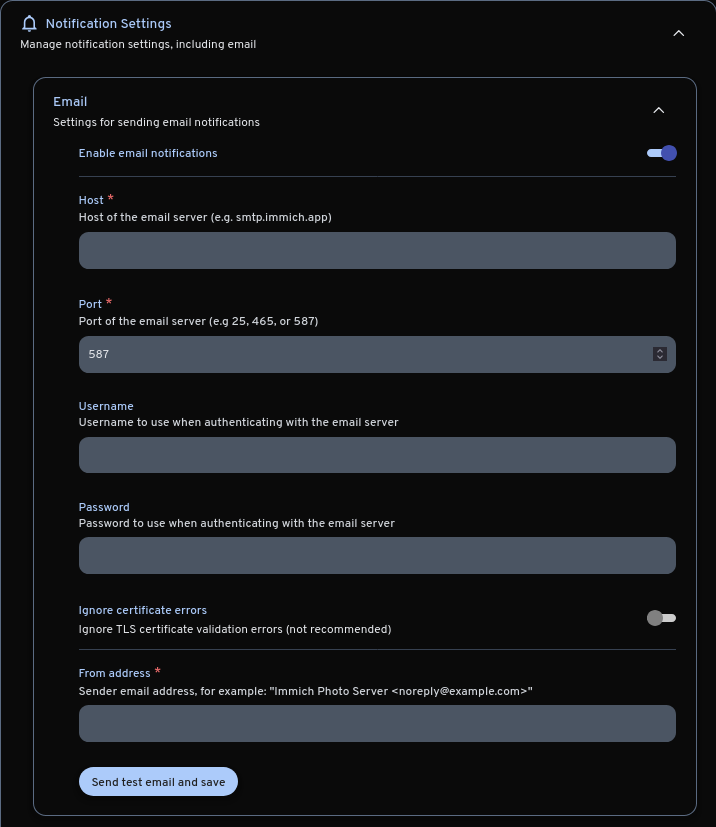
You may now enter the SMTP settings of your provider.
Gmail
To configure Immich for Gmail, you will need these information:
- SMTP server:
smtp.gmail.com - Port:
587(Recommended - TLS) or465(SSL) - Username:
[email protected] - Password: an app password
- Ignore certificate errors: Unchecked
- From address:
Immich Photo Server <[email protected]>
Outlook
INFO
If you want to use your email in Immich from Outlook, you'll first need to enable access. On Outlook:
- Select Settings -> Mail -> Forwarding and IMAP.
- Under POP and IMAP, toggle the slider for Let devices and apps use POP or Let devices and apps use IMAP to ON depending on the account you are enabling.
- Select Save.
To configure Outlook for Immich, you will need these information:
- SMTP server:
smtp-mail.outlook.com - Port:
587 - Username:
[email protected] - Password: Your Microsoft account password. If your password is not being recognized, you may need an app password.
- Ignore certificate errors: Unchecked
- From address:
Immich Photo Server <[email protected]>
Credit
This guide was created by Topiga. Consider buying an Immich license to support their great work!